This article shows how to setup the Audio Hijack software on Mac to send audio from iTunes into our live-streaming platform.
It can also be used to send audio from any other application and/or the microphone.
If you only need to stream audio that comes in from a microphone or line-in device you can use the freeware BUTT tool to do this.
See the Stream audio using BUTT article for details.
-
Purchase and install Audio Hijack. The demo version is available for free download but will start adding noise to the stream after 10 minutes. Please consult the Audio Hijack website for setup instructions.
-
Start your stream trial with us. After creating your trial our team will provide you with the connection settings to use.
-
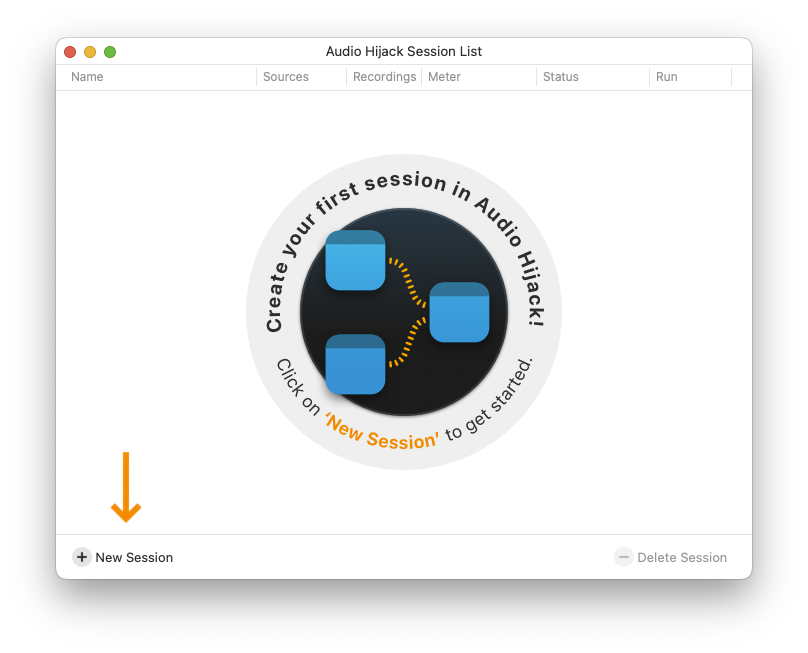
Open Audio Hijack and under the "Session" menubar item, select "New Session" or click the "New Session" button on the main interface.
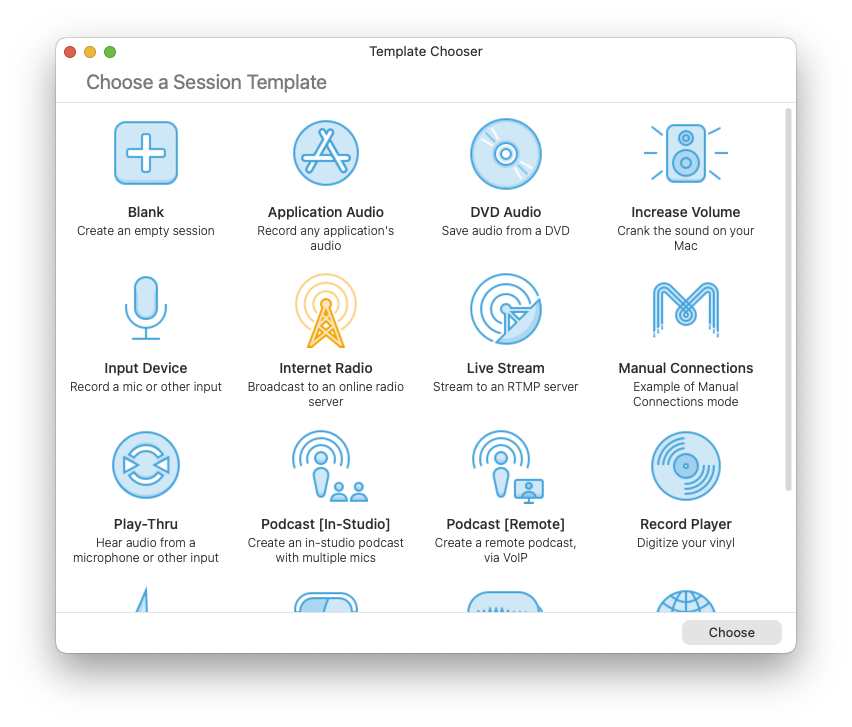
- Select "Internet Radio" from the list of presets.
- By default it creates a setup that will take audio from iTunes and the system microphone and stream both to the endpoint.
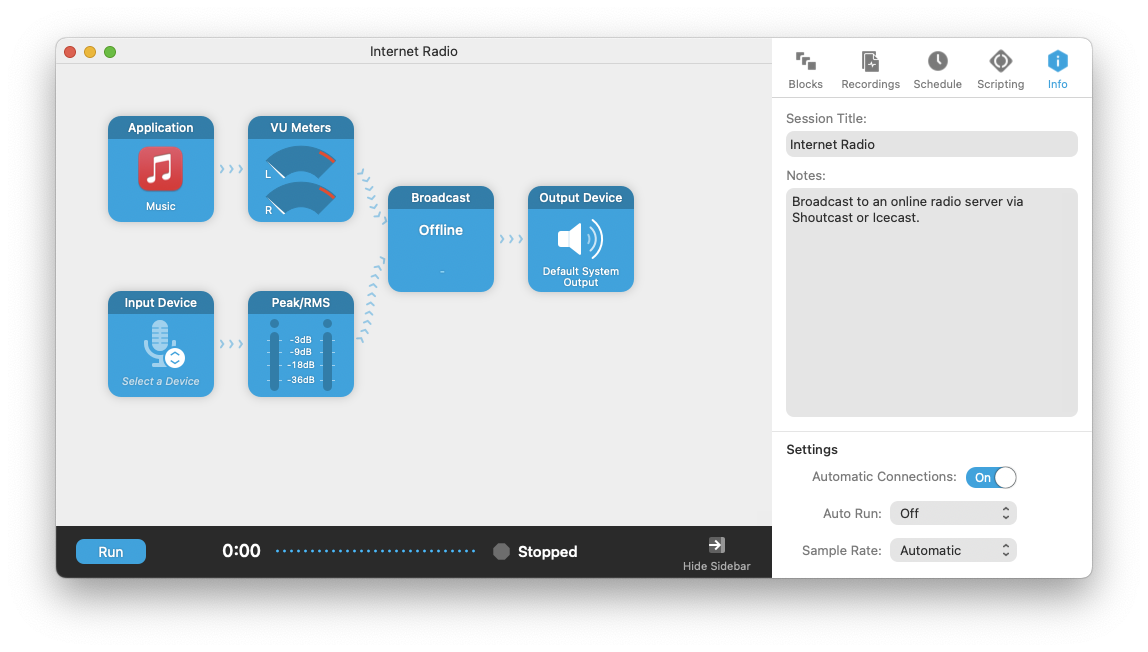
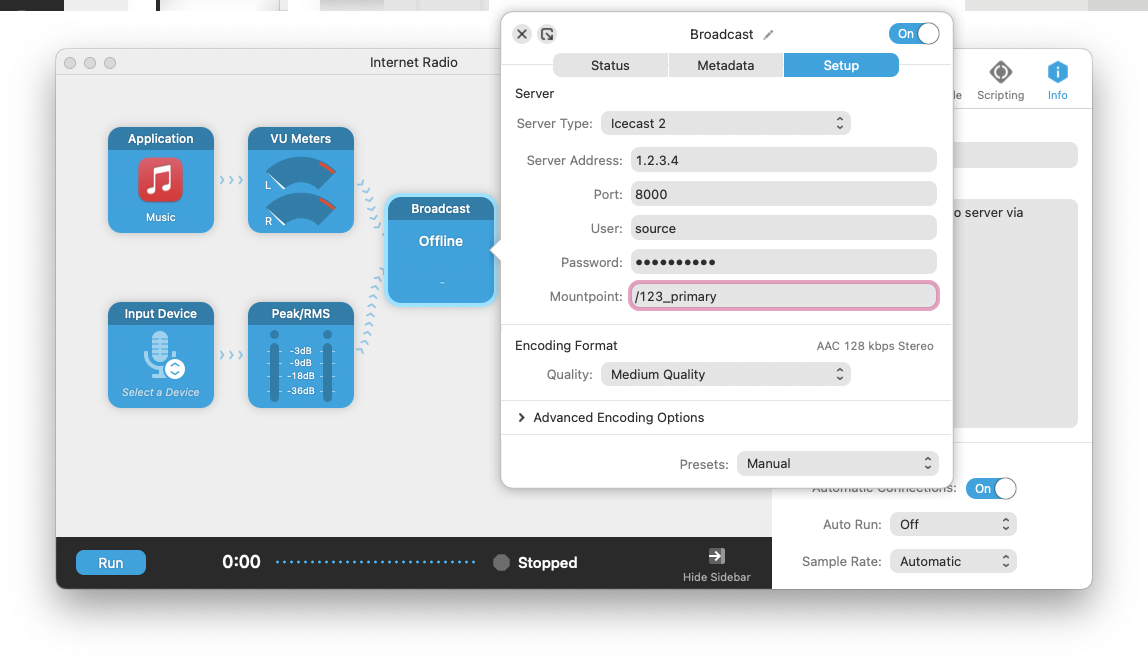
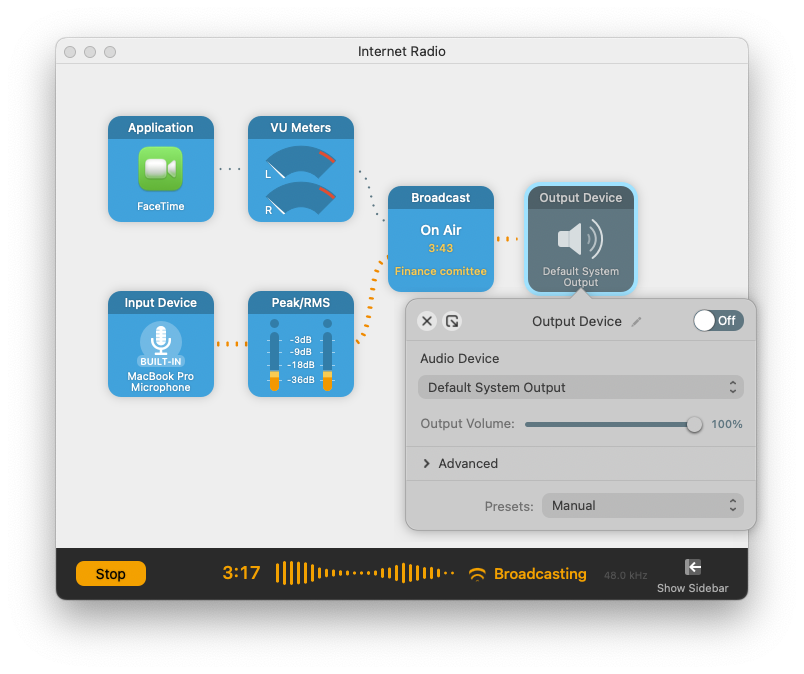
- Click on the "Broadcast" block to configure it, and under the "Setup" tab enter the provided connection details.
- Close the "Broadcast" setup window and click on the "Run" button at the bottom left to start capturing and streaming audio.
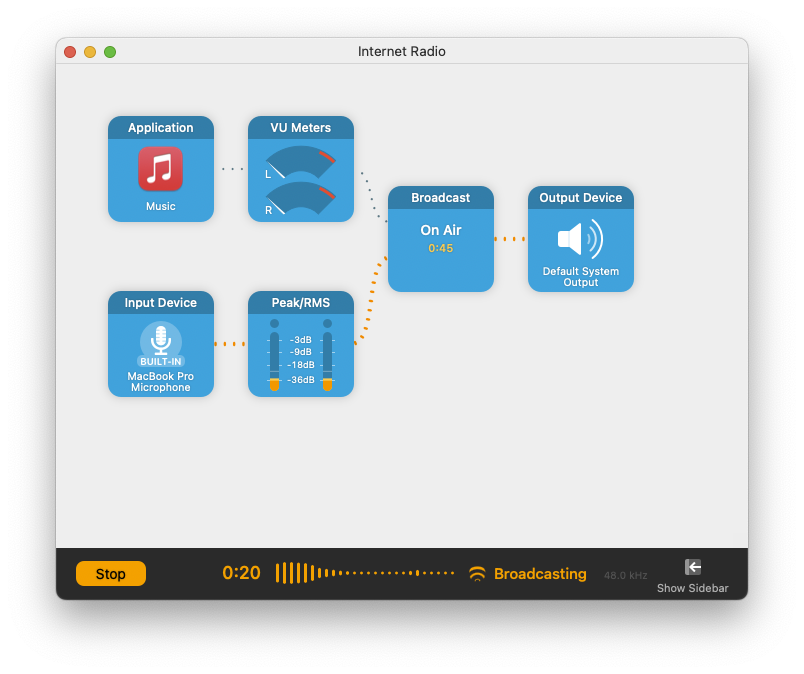
- Once streaming it will show "On Air" in the "Broadcast" block, along with the stream running time. The VU meters and bars between block will indicate active audio volumes.
Sending Now Playing metadata
- When using iTunes to play content, Audio Hijack can get the current song title directly from it. Open the configuration of the "Broadcast" block, switch to the "Metadata" tab, and use the "Source" drop-down list to select iTunes.
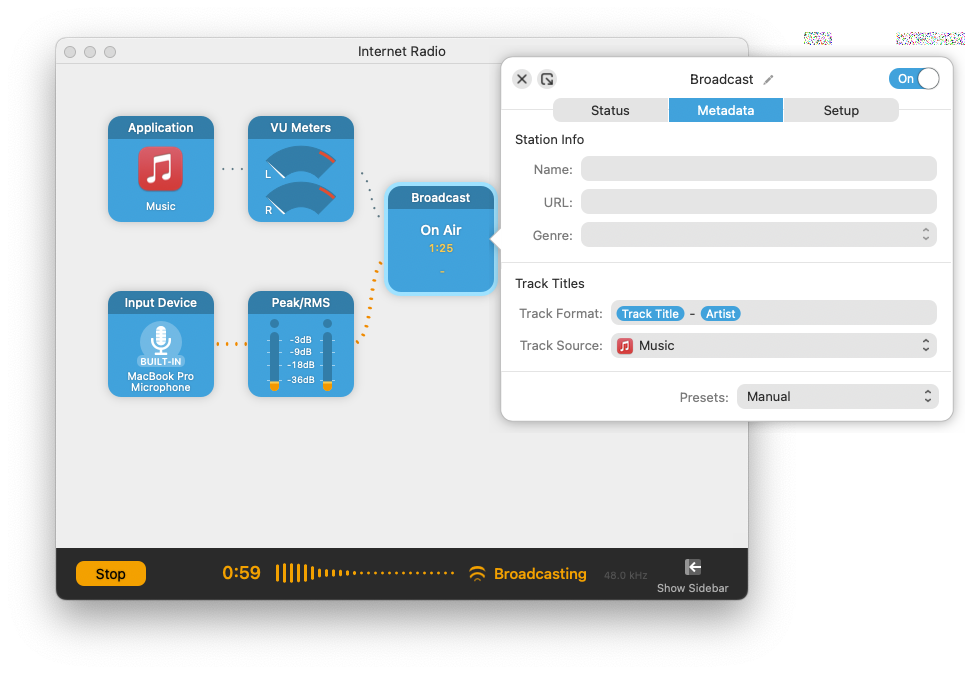
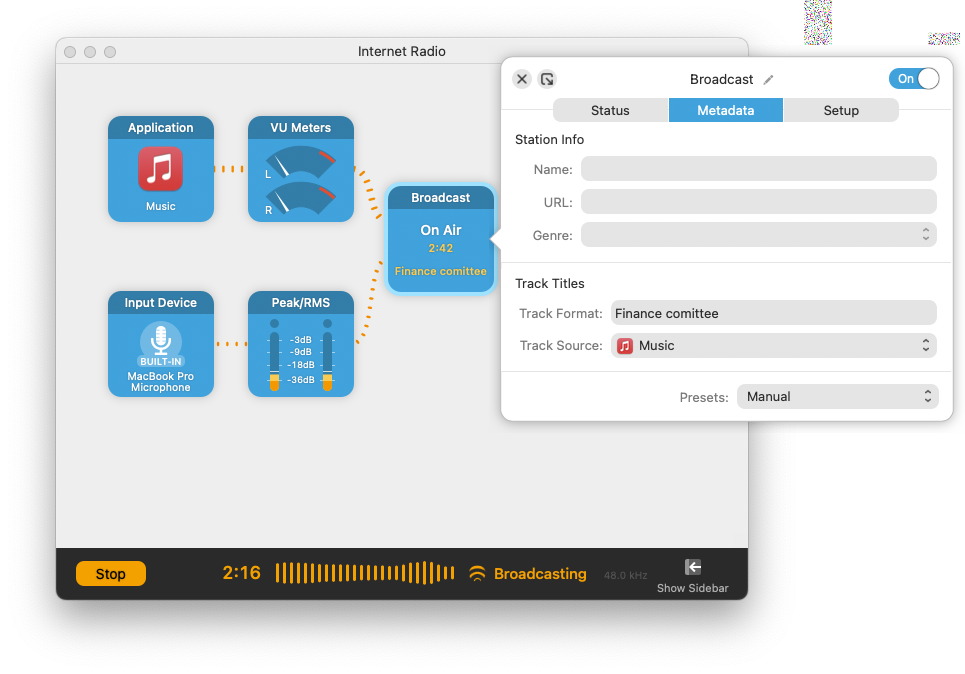
- To manually specify a title for the stream's "Now Playing" information, for example when streaming a conference meeting, simple enter the name into the "Title Format".
Notes:
-
We strongly recommend using the string format "A - B" as most Icecast players expect an "Artist - Song Title" formatted string.
-
The maximum supported length of the title is 75 characters. Anything longer than this will be truncated.
Streaming a Zoom (or other) meeting
-
To stream audio from a video conferencing tool, like Zoom, click on the "Application" block and select another application under "Source".
-
Once selected, expand the "Advanced" block below "Source" and disable the "Include audio input" checkbox. This ensures microphone audio is not captured to the stream while your application is on "Mute".
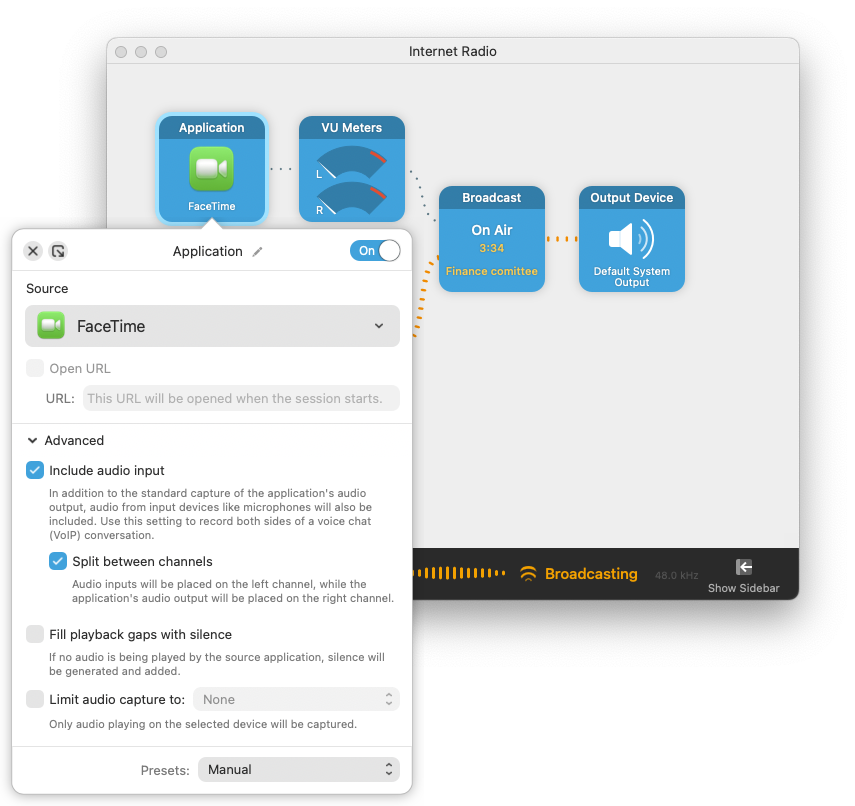
- After this is done, remove the unnecessary output block. Important: in order to prevent feedback or echo it is recommended to use this configuration only with headphones.
Recording a session
- To record a streaming session, drag a new "Recorder" block into the audio modules.
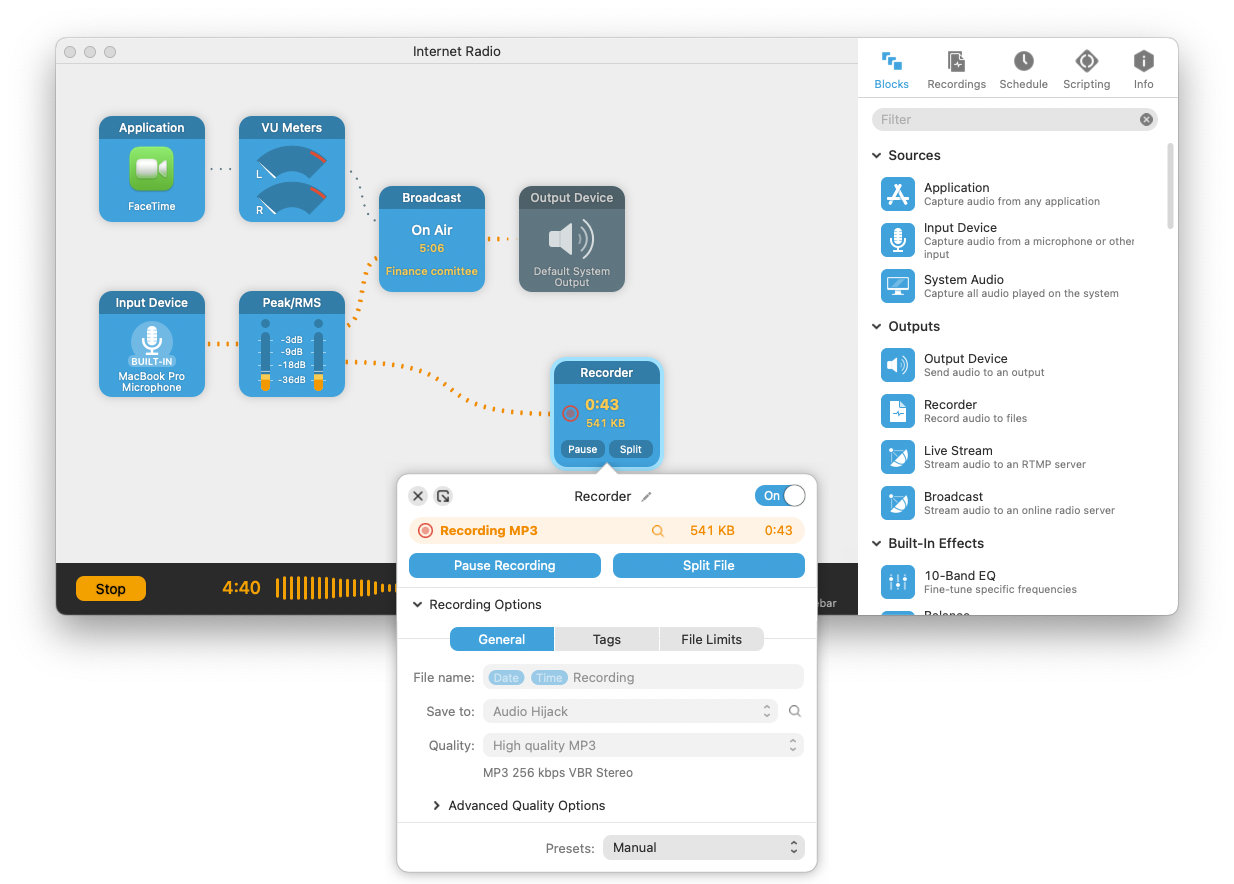
- Various options can be controlled for the recorder, but the default setup should be fine in most cases. The recorded will start recording once the streaming session starts, and files are created to the "Home> Music > Audio Hijack" folder.
Advanced Setup
Audio Hijack also allows more advanced items to be setup. For example, in the right-side toolbar, under the "Advanced" blocks, drag a new "Input Switch" block into the graph just before the "Broadcast" block. Now the input to be streamed can be toggled between the microphone input and the iTunes audio.
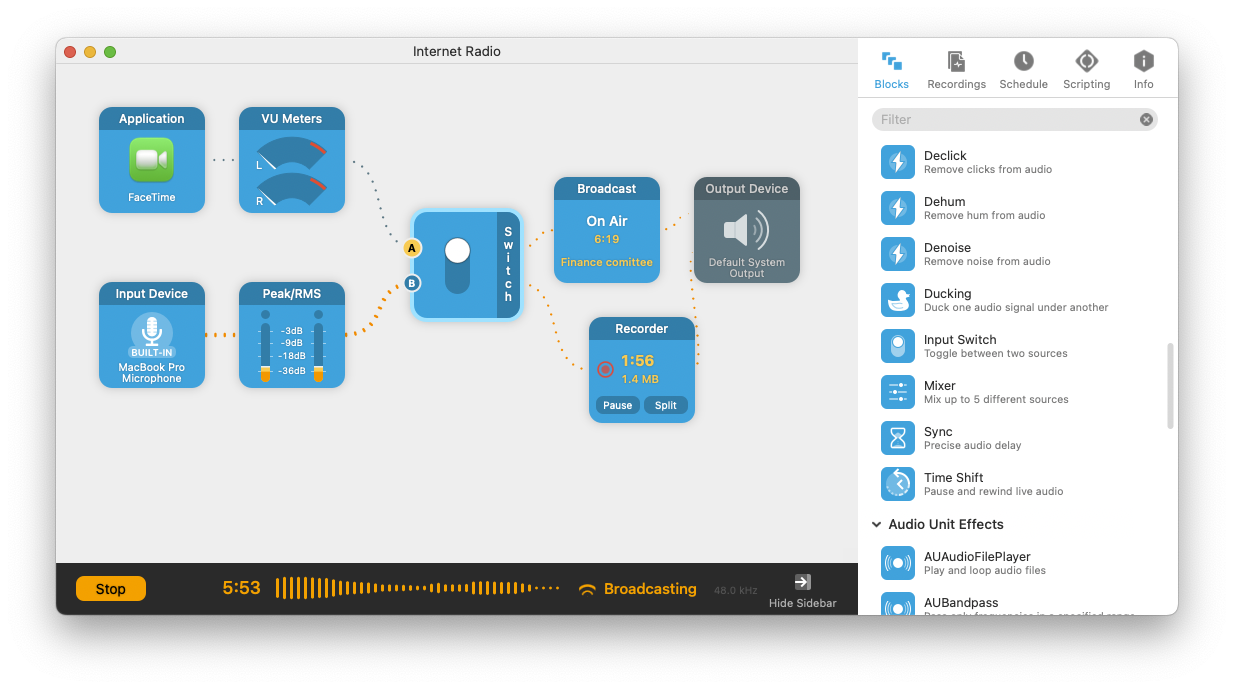
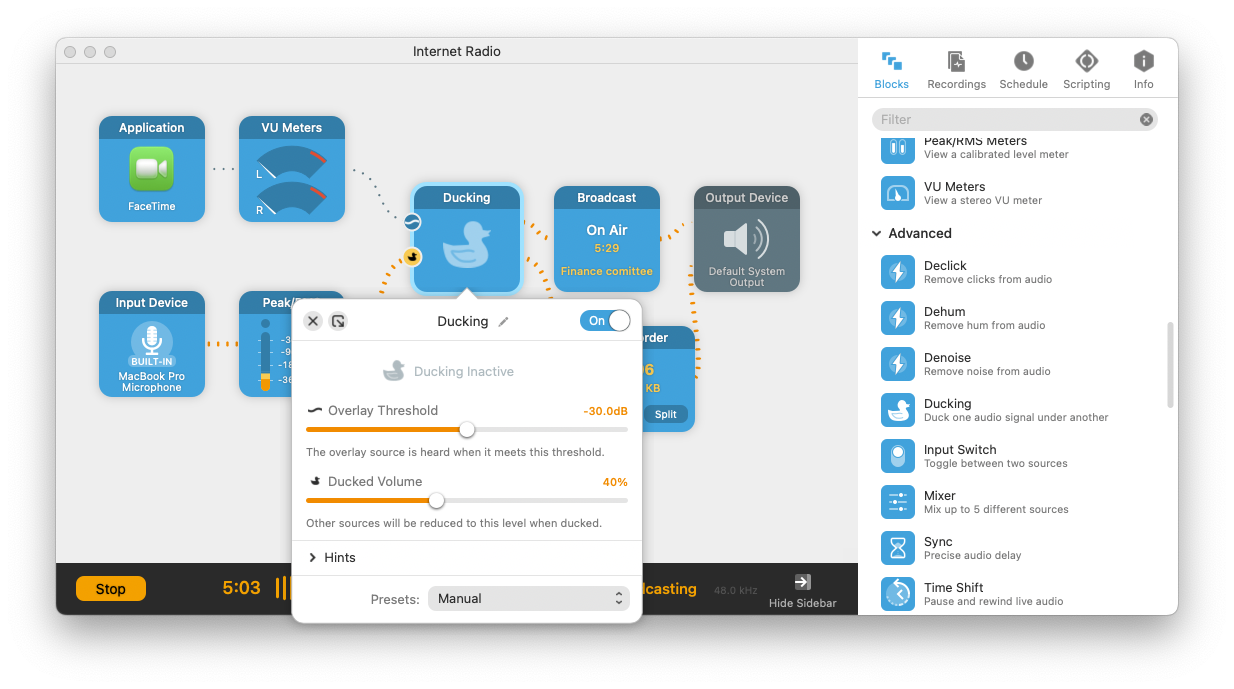
Another example is the "Ducking" block, which can automatically lower the volume of one input source (for example iTunes) when another reaches a certain threshold (for example the Microphone). This allows an easy way to add voice over background audio.